

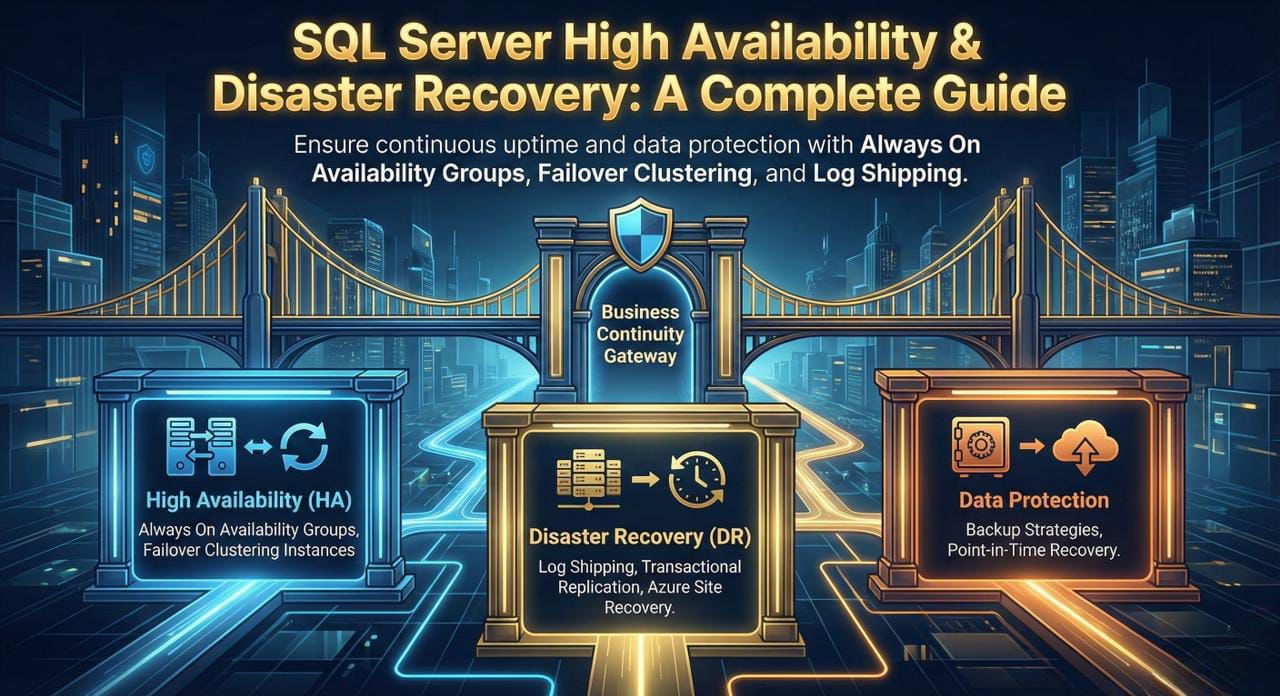
This comprehensive guide covers everything you need to know about SQL Server High Availability (HA) and Disaster Recovery (DR) solutions. Learn how to ensure your databases remain accessible and protected against failures.
Table of Contents
Conceptual Understandings
[High Availability in SQL Server]
Target: All SQL Server Instances need to be kept 100% working and 24x7 running.
Utilizing: 'Fault Tolerant' components and also needless other components.
Things To Do (to achieve High Availability):
- Replication
- Log Shipping
- Mirroring
- Clustering
- AlwaysON Availability Groups
1. Replication
| Source Server | Destination Server |
|---|---|
| Called as Publisher | Called as Subscriber |
| Other Server Called as Distributor |
|
Table 1) Schematic Work Scenario for Replication
Publisher SQL Server Instance (Pub) copies the databases to Subscriber SQL Server Instance (Sub) scheduled with SQL Server Agents with job processes.
Distributor SQL Server Instance (Dis) duplicates Sub with normal sync operations.
In a Server to Server interaction, anyone can be Sub or Pub depending on who is on receiving end and who is on sending end respectively at any point of time.
Types or Varieties of Replication:
- 1.1 Snapshot Replication
- 1.2 Transactional Replication
- 1.3 Merge Replication
- 1.4 Peer to Peer (P2P) Replication
1.1 Snapshot Replication
Pub provides database snapshots to the Sub.
In cases of multiple servers connected sequentially as given below.
At any time,
S1 → S2 → S3 → S4
***S1 is a Pub for S2 and S2 is Sub for S1
S2 is a Pub for S3 and S3 is Sub for S2
S3 is a Pub for S4 and S4 is Sub for S3
'→' Indicates a Snapshot Replication is being carried out over the source (left of '→') to target (right of '→')
The main benefit of the first interaction in this (S1 → S2) is that the snapshots replicated here becomes a source of lookup for minimal changes in further same snapshot replications ahead in sequence.
1.2 Transactional Replication
Since we are bound to have some Transactions on SQL Servers at any moment of time, such transactions on Pub end need to be updated again on Sub end or 'Dis' end. For this Transaction Replications are carried out by transactional processes (SSA Jobs).
1.3 Merge Replication
Moving further in time (i.e. after snapshot replication and transactional replication has just finished), at that instant, both System (Pub and Sub) are shadowed OFFLINE, and made ONLINE immediately with no other delay. And carry out a Synchronization Process between them.
1.4 Peer to Peer (P2P) Replication
In a Peer to Peer replication, we need to consider Sequential interaction from above:
S1 → S2 → S3 → S4
The transaction that has been carried out on S2 from S1 need also be carried out over the S3 and S4 servers. This process if happens then, as soon S2 gets the transactional instructions same would be passed on to S3 and S4.
Hence Peer to Peer Replication is carried out.
REPLICATION AGENTS:
- Replication Agents are standalone programs which generate snapshots, reads transaction logs, distributes data to Sub and reconciles changes.
- It can perform one-way (transactional, snapshot), bidirectional (transactional), and multi-master setups (merge and peer-to-peer).
| Replication Type | Express, Web | Standard | Enterprise | Azure SQL Database | Azure SQL Managed Instance |
|---|---|---|---|---|---|
| Transactional | Subscriber Only | Yes | Yes | Subscriber Only | Yes |
| Snapshot | Subscriber Only | Yes | Yes | Subscriber Only | Yes |
| Merge | no | Yes | Yes | no | no |
| Bi-Directional | no | Yes | Yes | no | Yes |
| Peer-to-Peer | no | no | Yes | no | Yes |
2. Log Shipping
| Source Server | Destination Server |
|---|---|
| Called as Primary | Called as Secondary |
| Other Server | |
| Called as Monitor: This is Optional | |
*Underlined term are for general understanding.
*Bold terms are for Professional Communication.
Table 2) Schematic Work Scenario for Log Shipping
Databases in the Secondary server are restored with no recovery using SSA and job schedules at a definite interval from Databases in Primary. Supports multiple secondary servers.
Used in the smallest amounts of time for HA because when fail-over happens, the secondary database needs to be updated manually with un-restored log backups.
3. Mirroring
| Source Server | Destination Server |
|---|---|
| Called as Principal | Called as Mirror |
| Other Server | |
| Called as Witness: This is Optional | |
*Underlined term are for general understanding.
*Bold terms are for Professional Communication.
Table 3) Schematic Work Scenario for Mirroring
Databases in the Mirror server are restored with no recovery from the databases in principal server. Once this has completed, transactions are copied to the Mirror server. Fail-over gets finished in seconds. If the Principal server is down, the Mirror server acts as Principal server.
4. Clustering
| Called as Active Node | Called as Passive Node |
|---|---|
| "Prerequisites" | |
| Windows Clustering setup with shared storage. | |
*Underlined term are for general understanding.
*Bold terms are for Professional Communication.
Table 4) Schematic Understanding Scenario for SQL servers in Clusters.
Clusters involve a minimum of 2 servers.
If one is down, others must take up the responsibility for same. This is no brainer for architectures with near 100% up-time. Assume a Server fails, then where the task on it was unable to complete, the same instructions need to be passed on to other servers in the same cluster, the task need not be necessarily restarted.
There are 2 scenarios for setting up a 2 server cluster:
- Server 1 is Active and Server 2 is Active.
Either one of them fails then the other shall failover. - Server 1 is Active and Server 2 is Passive
Active fails then Passive one become immediately Active and start working. Remember, in Passive Node we just need sql server services to start running and be in sync with data alike previously Active Node.
5. AlwaysON Availability Groups
| Server/Node with sql server services up and running | Server/Node with sql server services down |
|---|---|
| Called as Primary Replica | Called as Secondary Replica |
| "Prerequisites" | |
| Windows Clustering setup with shared storage. | |
*Underlined term are for general understanding.
*Bold terms are for Professional Communication.
Table 5) Schematic Work Scenario for AlwaysON AG.
AlwaysON AG is a feature of MS SQL server 2012 and versions ahead.
An Availability Group (AG) is a group of selected databases. The group is decided on the basis such that the group itself fails over together if a failure has occurred.
It consists of one Primary Replica for read-write connections and upto 8 Secondary Replicas, which is used for read only connections for reporting purposes. To make the interaction between databases easier AG Listener can be created. It is a Virtual Name that consists of a Unique DNS name, Virtual IPs, and a TCP Port number, which provides a direct connection to the replica on that AG.
Tutorial: Prepare SQL Server for Replication (Publisher, Distributor, Subscriber)
Applies to:
SQL Server
It's important to plan for security before you configure your replication topology. This tutorial shows you how to better secure a replication topology. It also shows you how to configure distribution, which is the first step in replicating data. You must complete this tutorial before any of the others.
Note
To replicate data securely between servers, you should implement all of the recommendations in Replication security best practices.
This tutorial teaches you to prepare a server so that replication can run securely with least privileges.
In this tutorial, you learn how to:
- Create Windows accounts for replication.
- Prepare the snapshot folder.
- Configure distribution.
Prerequisites
This tutorial is for users who are familiar with fundamental database operations, but who have limited exposure to replication.
To complete this tutorial, you need SQL Server, SQL Server Management Studio (SSMS), and an AdventureWorks database:
At the publisher server (source), install:
- Any edition of SQL Server, except SQL Server Express or SQL Server Compact. These editions can't be replication publishers.
- The AdventureWorks 2025 sample database. To enhance security, the sample databases aren't installed by default.
At the subscriber server (destination), install any edition of SQL Server, except:
- At the subscriber server (destination), install any edition of SQL Server, except SQL Server Compact. SQL Server Compact can't be a subscriber in transactional replication.
- Install SQL Server Management Studio.
- Install SQL Server Developer edition.
- Download the AdventureWorks sample database. For instructions on restoring a database in SSMS, see Restore a Database Backup Using SSMS.
Note
- Replication isn't supported on SQL Server instances that are more than two versions apart. For more information, see Replication backward compatibility.
- In SQL Server Management Studio, you must connect to the publisher and subscriber by using a login that is a member of the sysadmin fixed server role. For more information on this role, see Server-level roles.
Estimated time to complete this tutorial: 30 minutes
Create Windows accounts for replication
In this section, you create Windows accounts to run replication agents. You create a separate Windows account on the local server for the following agents:
| Agent | Location | Account name |
|---|---|---|
| Snapshot Agent | Publisher | <machine_name>\repl_snapshot |
| Log Reader Agent | Publisher | <machine_name>\repl_logreader |
| Distribution Agent | Publisher and subscriber | <machine_name>\repl_distribution |
| Merge Agent | Publisher and subscriber | <machine_name>\repl_merge |
Note
In the replication tutorials, the publisher and distributor share the same instance (NODE1\SQL2016) of SQL Server. The subscriber instance (NODE2\SQL2016) is remote. The publisher and subscriber might share the same instance of SQL Server, but it isn't a requirement. If the publisher and subscriber share the same instance, the steps that are used to create accounts at the subscriber aren't required.
Create local Windows accounts for replication agents at the publisher
- At the publisher, open Computer Management from Administrative Tools in Control Panel.
- In System Tools, expand Local Users and Groups.
- Right-click Users and then select New User.
- Enter repl_snapshot in the User name box, provide the password and other relevant information, and then select Create to create the repl_snapshot account.
- Repeat the previous step to create the repl_logreader, repl_distribution, and repl_merge accounts.
- Select Close.
Create local Windows accounts for replication agents at the subscriber
- At the subscriber, open Computer Management from Administrative Tools in Control Panel.
- In System Tools, expand Local Users and Groups.
- Right-click Users and then select New User.
- Enter repl_distribution in the User name box, provide the password and other relevant information, and then select Create to create the repl_distribution account.
- Repeat the previous step to create the repl_merge account.
- Select Close.
For more information, see Replication Agents overview.
Prepare the snapshot folder
In this section, you configure the snapshot folder that's used to create and store the publication snapshot.
Create a share for the snapshot folder and assign permissions
- In File Explorer, browse to the SQL Server data folder. The default location is
C:\Program Files\Microsoft SQL Server\MSSQL.X\MSSQL\Data. - Create a new folder named repldata.
- Right-click this folder and select Properties.
- On the Sharing tab in the repldata Properties dialog box, select Advanced Sharing.
- In the Advanced Sharing dialog box, select Share this Folder, and then select Permissions.
Configuration Steps
Follow these steps in the Permissions dialog:
- In the Permissions for repldata dialog box, select Add.
- In the Select User, Computers, Service Account, or Groups box, type the name of the Snapshot Agent account that you created previously, as
<Publisher_Machine_Name>\repl_snapshot. Select Check Names, and then select OK. - Repeat step 6 to add the other two accounts that you created previously:
<Publisher_Machine_Name>\repl_merge<Publisher_Machine_Name>\repl_distribution
- After you add the three accounts, assign the following permissions:
- repl_distribution: Read
- repl_merge: Read
- repl_snapshot: Full Control
Step 1: Browse to Data Folder
Navigate to SQL Server data directory
Step 2: Share Folder
Enable Advanced Sharing for repldata
Step 3: Set Permissions
Add accounts and assign permissions
- After your share permissions are configured correctly, select OK to close the Permissions for repldata dialog box. Select OK to close the Advanced Sharing dialog box.
Permission Summary
| Account | Permission Level | Purpose |
|---|---|---|
repl_snapshot |
Full Control | Creates and writes snapshot files |
repl_distribution |
Read | Reads snapshot files for distribution |
repl_merge |
Read | Reads snapshot files for merge replication |
Configure distribution
In this section, you configure distribution at the publisher and set the required permissions on the publication and distribution databases. If you already configured the distributor, you must disable publishing and distribution before you begin this section. Don't disable publishing and distribution if you must keep an existing replication topology, especially in production.
Configuring a publisher with a remote distributor is outside the scope of this tutorial.
Configure distribution at the publisher
- Connect to the publisher in SQL Server Management Studio, and then expand the server node.
- Right-click the Replication folder and select Configure Distribution.
Connection Note
If you connect to SQL Server by using localhost rather than the actual server name, you're prompted with a warning that SQL Server can't connect to localhost or IP Address. Select OK in the warning dialog box. In the Connect to Server dialog box, change Server name from localhost or IP Address to the name of your server. Then select Connect.
There's currently a known issue with SQL Server Management Studio (SSMS) 18.0 (and later) where a warning message isn't displayed when connecting to the Distributor with the IP address, but is still invalid. The actual server name should be used when connecting to the Distributor.
The Distribution Configuration Wizard starts.
- On the Distributor page, select <ServerName> will act as its own Distributor; SQL Server will create a distribution database and log. Then select Next.
- If the SQL Server Agent isn't running, on the SQL Server Agent Start page, select Yes, configure the SQL Server Agent service to start automatically. Select Next.
- Enter the path
\<Publisher_Machine_Name>\repldatain the Snapshot folder box, and then select Next. This path should match what you saw previously under Network Path for your repldata properties folder after configuring your share properties. - Accept the default values on the remaining pages of the wizard.
- Select Finish to enable distribution.
Common Error
You might see the following error when configuring the distributor. It's an indication that the account that was used to start the SQL Server Agent account isn't an administrator on the system. You either need to start the SQL Server Agent manually, grant those permissions to the existing account, or modify which account the SQL Server Agent is using.
Error Message: An error occurred configuring SQL Server Agent.
SQL Server blocked access to procedure 'dbo.sp_set_sqlagent_properties' of component 'Agent XPs' because this component is turned off as part of the security configuration for this server.
If your SQL Server Management Studio instance is running with administrative rights, you can start the SQL Agent manually from within SSMS.
Set database permissions
- In SQL Server Management Studio, expand Security, right-click Logins, and then select New Login.
- On the General page, select Search. Enter
<Publisher_Machine_Name>\repl_snapshotin the Enter the object name to select box, select Check Names, and then select OK.
Snapshot Agent
Account: repl_snapshot
Permission: Full Control
Distribution & Merge Agents
Accounts: repl_distribution, repl_merge
Permission: Read
- On the User Mapping page, select the distribution database and select db_owner for the Database role membership for: distribution list.
- On the Securables page, select Add. In the Add Objects window, select All objects of the types. Select OK. In the Select Objects page, select Databases. Select OK. In the Securables page, select distribution. In the Explicit permissions list, select Grant for the View database state permission. Select OK.
- Repeat steps 8 through 11 to create a login for
repl_logreader,repl_distribution, andrepl_merge.
Verify that the following permissions are allowed:
- In the repldata Properties dialog box, select the Security tab and select Edit.
- In the Permissions for repldata dialog box, select Add. In the Select Users, Computers, Service Accounts, or Groups box, type the name of the Snapshot Agent account that you created previously, as
<Publisher_Machine_Name>\repl_snapshot. Select Check Names, and then select OK. - Repeat the previous step to add permissions for the Distribution Agent as
<Publisher_Machine_Name>\repl_distribution, and for the Merge Agent as<Publisher_Machine_Name>\repl_merge.
- Select the Sharing tab again and note the Network Path for the share. You need this path later when you're configuring your snapshot folder.
- Select OK to close the repldata Properties dialog box.
For more information, see Secure the Snapshot Folder.
Tutorial: Configure replication between two fully connected servers (transactional)
Applies to:
SQL Server
Transactional replication is a good solution to the problem of moving data between continuously connected servers. By using the Replication Wizard, you can easily configure and administer a replication topology.
This tutorial shows you how to configure a transactional replication topology for continuously connected servers. For more information about how transactional replication works, see the overview of transactional replication.
What you will learn
This tutorial teaches you to publish data from one database to another by using transactional replication.
In this tutorial, you will learn how to:
- Create a publisher via transactional replication.
- Create a subscriber for the transactional publisher.
- Validate the subscription and measure latency.
Prerequisites
This tutorial is for users who are familiar with basic database operations, but who have limited experience with replication. Before you start this tutorial, you must complete Tutorial: Prepare SQL Server for replication.
To complete this tutorial, you need SQL Server, SQL Server Management Studio (SSMS), and an AdventureWorks database:
At the publisher server (source), install:
- Any edition of SQL Server, except SQL Server Express or SQL Server Compact. These editions can't be replication publishers.
- The AdventureWorks 2025 sample database. To enhance security, the sample databases are not installed by default.
At the subscriber server (destination):
- Install any edition of SQL Server, except SQL Server Compact. SQL Server Compact cannot be a subscriber in transactional replication.
- Install SQL Server Management Studio.
- Install SQL Server 2017 Developer edition.
Note
- Replication is not supported on SQL Server instances that are more than two versions apart.
- In SQL Server Management Studio, you must connect to the publisher and subscriber by using a login that is a member of the sysadmin fixed server role. For more information on this role, see Server-level roles.
Estimated time to complete this tutorial: 60 minutes
Configure the publisher for transactional replication
In this section, you create a transactional publication by using SQL Server Management Studio to publish a filtered subset of the Product table in the AdventureWorks 2025 sample database. You also add the SQL Server login used by the Distribution Agent to the publication access list (PAL).
Create a publication and define articles
- Connect to the publisher in SQL Server Management Studio, and then expand the server node.
- Right-click SQL Server Agent and select Start. The SQL Server Agent should be running before you create the publication. If this step does not start your agent, you'll need to do so manually from SQL Server Configuration Manager.
- Expand the Replication folder, right-click the Local Publications folder, and select New Publication. This step starts the New Publication Wizard.
- On the Publication Database page, select AdventureWorks2025, and then select Next.
Note
If the SQL Agent doesn't visibly start, right-click the SQL Server Agent in SSMS and select Refresh. If it's still in the stopped state, start it manually from SQL Server Configuration Manager.
Set database permissions
- In SQL Server Management Studio, expand Security, right-click Logins, and then select New Login.
- On the General page, select Search. Enter
<Publisher_Machine_Name>\repl_snapshotin the Enter the object name to select box, select Check Names, and then select OK. - On the User Mapping page, in the Users mapped to this login list, select both the distribution and AdventureWorks2025 databases.
In the database role membership list, select the db_owner role for the login for both databases.
- Select OK to create the login.
- Repeat steps 1-4 to create a login for the other local accounts (repl_distribution, repl_logreader, and repl_merge). These logins must also be mapped to users who are members of the db_owner fixed database role in the distribution and AdventureWorks databases.
Replication Logins Created
NODE1\repl_snapshotNODE1\repl_distributionNODE1\repl_logreaderNODE1\repl_merge
For more information, see Configure distribution and Replication Agent security model.
Next step
You have successfully configured your publisher for transactional replication. Next, you'll create the publication and configure articles.
- On the Publication Type page, select Transactional publication, and then select Next.
- On the Articles page, expand the Tables node and select the Product check box. Then expand Product and clear the check boxes next to ListPrice and StandardCost. Select Next.
- On the Filter Table Rows page, select Add.
- In the Add Filter dialog box, select the SafetyStockLevel column. Select the right arrow to add the column to the filter statement WHERE clause of the filter query. Then manually type in the WHERE clause modifier as follows:
WHERE [SafetyStockLevel] < 500- Select OK, and then select Next.
- Select the Create a snapshot immediately and keep the snapshot available to initialize subscriptions check box, and select Next.
If you plan to change the snapshot properties, do not start the Snapshot Agent until after you change the properties in the publication property dialog box.
Publication Database
Selected: AdventureWorks2025
Publication Type
Type: Transactional publication
Article Configuration
- Table Selected: Product
- Columns Excluded: ListPrice, StandardCost
- Filter Applied: SafetyStockLevel < 500
- On the Agent Security page, clear the Use the security settings from the Snapshot Agent check box.
Select Security Settings for the Snapshot Agent. Enter <Publisher_Machine_Name>\repl_snapshot in the Process account box, supply the password for this account, and then select OK.
Snapshot Agent Security
Process account:
<Publisher_Machine_Name>\repl_snapshot
Connect to Publisher: By impersonating the process account
Log Reader Agent Security
Process account:
<Publisher_Machine_Name>\repl_logreader
Connect to Publisher: By impersonating the process account
- Repeat the previous step to set
<Publisher_Machine_Name>\repl_logreaderas the process account for the Log Reader Agent. Then select OK. - On the Complete the Wizard page, type AdvWorksProductTrans in the Publication name box, and select Finish.
Complete the Wizard - Publication Summary
Publication name: AdvWorksProductTrans
Click Finish to perform the following actions:
- Create the publication.
A publication will be created with the following options:
- Create a transactional publication from database 'AdventureWorks2012'.
- The Snapshot Agent process will run under the 'NODE1\repl_snapshot' account.
- The Log Reader Agent process will run under the 'NODE1\repl_logreader' account.
- The publication compatibility level will support Subscribers that are servers running SQL Server 2008 or later.
- Publish the following tables as articles:
- 'Product'
- Exclude columns from the following tables:
- 'Product'
- Exclude rows of the following tables that do not meet the criteria of their filters:
- 'Product'
- Create a snapshot of this publication immediately after the publication is created.
- After the publication is created, select Close to complete the wizard.
Possible Error
You might encounter the following error if your SQL Server Agent is not running when you try to create the publication. This error indicates that your publication was created successfully but your Snapshot Agent was unable to start. If this happens, you'll need to start the SQL Server Agent, and then manually start the Snapshot Agent. The next section gives instructions.
SQL Server could not start the Snapshot Agent.
Additional information:
- An exception occurred while executing a Transact-SQL statement or batch. (Microsoft.SqlServer.ConnectionInfo)
- SQLServerAgent is not currently running so it cannot be notified of this action. Changed database context to 'AdventureWorks2012'. (Microsoft SQL Server, Error: 22022)
Creating Publication - Status
| Action | Status | Message |
|---|---|---|
| Creating Publication 'AdvWorksProductTrans' | Success | |
| Adding article 1 of 1 | Success | |
| Starting the Snapshot Agent | Warning | SQL Server could not... |
View the status of snapshot generation
- Connect to the publisher in SQL Server Management Studio, expand the server node, and then expand the Replication folder.
- In the Local Publications folder, right-click AdvWorksProductTrans, and then select View Snapshot Agent Status.
- The current status of the Snapshot Agent job for the publication appears. Verify that the snapshot job has succeeded before you continue to the next section.
If your SQL Server Agent was not running when you created the publication, you'll see that the Snapshot Agent was never run when you check the Snapshot Agent status for your publication. If that's the case, select Start to start your Snapshot Agent.
Before Starting
Agent type: Snapshot Agent
Publication: AdvWorksProductTrans
Publication database: [AdventureWorks2012]
Last status message:
The agent has never been run.
After Starting
Agent type: Snapshot Agent
Publication: AdvWorksProductTrans
Publication database: [AdventureWorks2012]
Duration: 00:00:01
Last status message:
[100%] A snapshot of 1 article(s) was generated.
If you see an error here, see Troubleshooting Snapshot Agent error.
Add the Distribution Agent login to the PAL
- Connect to the publisher in SQL Server Management Studio, expand the server node, and then expand the Replication folder.
- In the Local Publications folder, right-click AdvWorksProductTrans, and then select Properties. The Publication Properties dialog box appears.
- a. Select the Publication Access List page, and select Add.
- b. In the Add Publication Access dialog box, select
<Publisher_Machine_Name>\repl_distribution, and select OK.
Publication Access List (PAL)
The publication access list specifies the logins with permission to create and synchronize subscriptions.
| Login name | Type |
|---|---|
| sa | Standard |
| SQLREPRO\Administrator | Windows user |
| NT SERVICE\Winmgmt | Windows user |
| NT SERVICE\SQLWriter | Windows user |
| NT Service\MSSQL$SQL2... | Windows user |
| NT SERVICE\SQLAgent$... | Windows user |
| distributor_admin | Standard |
| NODE1\repl_distribution | Windows user |
For more information, see Replication programming concepts.
Create a subscription to the transactional publication
In this section, you add a subscriber to the publication that you previously created. This tutorial uses a remote subscriber (NODE2\SQL2016), but you can also add a subscription locally to the publisher.
Create the subscription
- Connect to the publisher in SQL Server Management Studio, expand the server node, and then expand the Replication folder.
- In the Local Publications folder, right-click the AdvWorksProductTrans publication, and then select New Subscriptions. The New Subscription Wizard starts.
- On the Publication page, select AdvWorksProductTrans, and then select Next.
Publication Selection
Publisher: NODE1\SQL2016
Databases and publications:
- AdventureWorks2012
- AdvWorksProductTrans (selected)
- On the Distribution Agent Location page, select Run all agents at the Distributor, NODE1\SQL2016 (push subscriptions), and then select Next. For more information on pull and push subscriptions, see Subscribe to publications.
Distribution Agent Location Options
- Run all agents at the Distributor (push subscriptions): This option makes it easier to administer the synchronization of subscriptions centrally.
- Run each agent at its Subscriber (pull subscriptions): This option reduces the processing overhead at the Distributor and lets each Subscriber administer the synchronization of its subscription.
Run the wizard more than once if you want some agents to run at the Distributor and some to run at Subscribers.
- On the Subscribers page, if the name of the subscriber instance is not displayed, select Add Subscriber, and then select Add SQL Server Subscriber from the drop-down list. This step opens the Connect to Server dialog box. Enter the subscriber instance name and then select Connect.
After the subscriber has been added, select the check box next to the instance name of your subscriber. Then select New Database under Subscription Database.
- The New Database dialog box appears. Enter ProductReplica in the Database name box, select OK, and then select Next.
| Subscriber | Subscription Database |
|---|---|
| NODE1\SQL2016 | |
| NODE2\SQL2016 | ProductReplica |
- On the Distribution Agent Security page, select the ellipsis (...) button. Enter
<Publisher_Machine_Name>\repl_distributionin the Process account box, enter the password for this account, select OK, and then select Next. - Select Finish to accept the default values on the remaining pages and complete the wizard.
Distribution Agent Security
Process account: <Publisher_Machine_Name>\repl_distribution
Connect to the Distributor: By impersonating the process account
Connect to the Subscriber: By impersonating the process account
Set database permissions at the subscriber
- Connect to the subscriber in SQL Server Management Studio. Expand Security, right-click Logins, and then select New Login.
- a. On the General page, under Login Name, select Search and add the login for
<Subscriber_Machine_Name>\repl_distribution. - b. On the User Mappings page, grant the login db_owner membership for the ProductReplica database.
- a. On the General page, under Login Name, select Search and add the login for
User Mapping Configuration
Login: NODE2\repl_distribution
Users mapped to this login:
| Map | Database | User |
|---|---|---|
| ProductReplica | NODE2\repl_distribution |
Database role membership for: ProductReplica
- db_owner
- public
- Select OK to close the New Login dialog box.
View the synchronization status of the subscription
- Connect to the publisher in SQL Server Management Studio. Expand the server node, and then expand the Replication folder.
- In the Local Publications folder, expand the AdvWorksProductTrans publication, right-click the subscription in the ProductReplica database, and then select View Synchronization Status. The current synchronization status of the subscription appears.
- If the subscription is not visible under AdvWorksProductTrans, select the F5 key to refresh the list.
View Synchronization Status
Subscription: NODE2\SQL2016:ProductReplica
Publication: AdvWorksProductTrans
Publication Database: NODE1\SQL2016:[AdventureWorks2012]
Last Sync: 4/3/2018 12:36:48 PM
Status: No replicated transactions are available
For more information, see:
Measure replication latency
In this section, you use tracer tokens to verify that changes are being replicated to the subscriber and to determine latency. Latency is the time it takes for a change made at the publisher to appear to the subscriber.
- Connect to the publisher in SQL Server Management Studio. Expand the server node, right-click the Replication folder, and then select Launch Replication Monitor.
- Expand a publisher group in the left pane, expand the publisher instance, and then select the AdvWorksProductTrans publication.
- a. Select the Tracer Tokens tab.
- b. Select Insert Tracer.
- c. View elapsed time for the tracer token in the following columns: Publisher to Distributor, Distributor to Subscriber, Total Latency. A value of Pending indicates that the token has not reached a specified point.
Replication Monitor - Tracer Tokens
Publication: AdvWorksProductTrans
Tracer Tokens measure latency from Publisher to Distributor, Distributor to Subscriber, and the total latency. Click here for more information.
| Tracer Token | Time Inserted | Publisher to Distributor | Distributor to Subscriber | Total Latency |
|---|---|---|---|---|
| Subscription: NODE2\SQL2016:ProductReplica | 4/3/2018 12:36:48 PM | 00:00:00 | 00:00:01 | 00:00:01 |
Congratulations!
You have successfully configured transactional replication between two fully connected servers. The publication is now replicating data from the publisher to the subscriber, and you can measure the latency using tracer tokens.
Next Steps
Now that you have successfully configured transactional replication, you can:
- Monitor replication performance using Replication Monitor
- Test failover scenarios
- Configure additional subscribers
- Implement security best practices
- Optimize replication performance
Conclusion
This comprehensive guide has covered the essential aspects of SQL Server High Availability and Disaster Recovery solutions. From basic concepts to advanced implementation techniques, you now have the knowledge to:
- Understand HA & DR concepts - The fundamental differences and use cases
- Implement Replication - Snapshot, Transactional, Merge, and Peer-to-Peer
- Configure Log Shipping - For disaster recovery scenarios
- Set up Mirroring - For high availability with automatic failover
- Deploy Clustering - For hardware-level fault tolerance
- Implement AlwaysOn Availability Groups - The most advanced HA solution
Key Takeaways
- Choose the right HA/DR solution based on your RTO and RPO requirements
- Always test your disaster recovery procedures regularly
- Monitor replication performance and latency continuously
- Implement proper security measures for all replication agents
- Document your HA/DR procedures and keep them updated
Remember that high availability and disaster recovery are not one-time implementations but ongoing processes that require regular maintenance, monitoring, and testing. Stay updated with the latest SQL Server features and best practices to ensure your databases remain highly available and protected against various failure scenarios.
For additional resources and advanced topics, refer to the official Microsoft SQL Server documentation and consider implementing a comprehensive monitoring solution to track the health and performance of your HA/DR infrastructure.
Tutorial: Configure replication between a server and mobile clients (merge)
Applies to:
SQL Server
Merge replication is a good solution to the problem of moving data between a central server and mobile clients that are only occasionally connected. By using the replication wizards, you can easily configure and administer a merge replication topology.
This tutorial shows you how to configure a replication topology for mobile clients. For more information about merge replication, see the overview of merge replication.
What you will learn
This tutorial teaches you to use merge replication to publish data from a central database to one or more mobile users so that each user gets a uniquely filtered subset of the data.
In this tutorial, you will learn how to:
- Configure a publisher for merge replication.
- Add a mobile subscriber for merge publication.
- Synchronize the subscription to the merge publication.
Prerequisites
This tutorial is for users who are familiar with fundamental database operations, but who have limited experience with replication. Before you start this tutorial, you must complete Tutorial: Prepare SQL Server for replication.
To complete this tutorial, you need SQL Server, SQL Server Management Studio (SSMS), and an AdventureWorks database:
At the publisher server (source), install:
- Any edition of SQL Server, except for SQL Server Express or SQL Server Compact. These editions cannot be a replication publisher.
- The AdventureWorks 2025 sample database. To enhance security, the sample databases are not installed by default.
At the subscriber server (destination):
- Install any edition of SQL Server, except SQL Server Express or SQL Server Compact. The publication that's created in this tutorial does not support either SQL Server Express or SQL Server Compact.
- Install SQL Server Management Studio.
- Install SQL Server 2017 Developer edition.
- Download the AdventureWorks sample database. For instructions on restoring a database in SSMS, see Restoring a database.
Note
- Replication is not supported on SQL Server instances that are more than two versions apart.
- In SQL Server Management Studio, you must connect to the publisher and subscriber by using a login that is a member of the sysadmin fixed server role. For more information on this role, see Server-level roles.
Estimated time to complete this tutorial: 60 minutes
Configure a publisher for merge replication
In this section, you create a merge publication by using SQL Server Management Studio to publish a subset of the Employee, SalesOrderHeader, and SalesOrderDetail tables in the AdventureWorks 2025 sample database. These tables are filtered with parameterized row filters so that each subscription contains a unique partition of the data. You also add the SQL Server login used by the Merge Agent to the publication access list (PAL).
Create merge publication and define articles
- Connect to the publisher in SQL Server Management Studio, and then expand the server node.
- Start the SQL Server Agent by right-clicking it in Object Explorer and selecting Start. If this step doesn't start the agent, you'll need to manually do so from SQL Server Configuration Manager.
- Expand the Replication folder, right-click Local Publications, and select New Publication. The New Publication Wizard starts.
- On the Publication Database page, select AdventureWorks2025, and then select Next.
- On the Publication Type page, select Merge publication, and then select Next.
Publication Database
Selected: AdventureWorks2025
Publication Type
Type: Merge publication
For more information, see:
- On the Subscriber Types page, ensure that only SQL Server 2008 (10.0.x) or later is selected, and then select Next.
- On the Filter Table Rows page, select Employee (Human Resources), select Add, and then select Add Join to Extend the Selected Filter.
- a. In the Add Join dialog box, select Sales.SalesOrderHeader under Joined table. Select Write the join statement manually, and complete the join statement as follows:
SQL
ON [Employee].[BusinessEntityID] = [SalesOrderHeader].[SalesPersonID]- b. In Specify join options, select Unique key, and then select OK.
Filter Table Rows Configuration
Selected Filter: Employee (Human Resources)
Join Configuration:
- Joined Table: Sales.SalesOrderHeader
- Join Type: Manual join statement
- Join Options: Unique key
- Statement:
[Employee].[BusinessEntityID] = [SalesOrderHeader].[SalesPersonID]
Filter Configuration Notes
- Select a row from this table will go to only one subscription, and select OK
- The filter ensures that each subscription gets a unique partition of the data
- Join filters extend the row filter to related tables
- Specify join options help optimize the filter performance
Base Table
Table: Employee (Human Resources)
Filter Type: Parameterized row filter
Joined Table
Table: Sales.SalesOrderHeader
Join Type: Extended filter join
- On the Filter Table Rows page, select SalesOrderHeader, select Add, and then select Add Join to Extend the Selected Filter.
- a. In the Add Join dialog box, select Sales.SalesOrderDetail under Joined table.
- b. Select Use the Builder to create the statement.
- c. In the Preview box, confirm that the join statement is as follows:
SQL
ON [SalesOrderHeader].[SalesOrderID] = [SalesOrderDetail].[SalesOrderID]- d. In Specify join options, select Unique key, and then select OK. Select Next.
- Select Create a snapshot immediately, clear Schedule the snapshot agent to run at the following times, and select Next.
- On the Agent Security page, select Security Settings. Enter
<Publisher_Machine_Name>\repl_snapshotin the Process account box, supply the password for this account, and then select OK. Select Next. - On the Complete the Wizard page, enter AdvWorksSalesOrdersMerge in the Publication name box and select Finish.
- After the publication is created, select Close. Under the Replication node in Object Explorer, right-click Local Publications and select Refresh to view your new merge replication.
Complete the Wizard - Merge Publication Summary
Publication name: AdvWorksSalesOrdersMerge
Click Finish to perform the following actions:
- Create the publication.
A publication will be created with the following options:
- Create a merge publication from database 'AdventureWorks2012'.
- The Snapshot Agent process will run under the 'NODE1\repl_snapshot' account.
- The publication compatibility level will support Subscribers that are servers running SQL Server 2008 or later.
- Publish the following tables as articles:
- 'Employee'
- 'SalesOrderDetail'
- 'SalesOrderHeader'
- Exclude columns from the following tables:
- 'Employee'
- Exclude rows of the following tables that do not meet the criteria of their filters:
- 'Employee'
- Apply the first table's filter to the second table based on the defined join statement:
- 'SalesOrderHeader(Employee)' to 'Employee(SalesOrderHeader)'
- 'SalesOrderDetail(SalesOrderHeader)' to 'SalesOrderHeader(SalesOrderDetail)'
- Create a snapshot of this publication immediately after the publication is created.
Employee Table
Filter: Parameterized row filter
Purpose: Base table for filtering
SalesOrderHeader
Join: Employee.BusinessEntityID
Purpose: Extended filter join
SalesOrderDetail
Join: SalesOrderHeader.SalesOrderID
Purpose: Detail records
- In the Local Publications folder, right-click AdvWorksSalesOrdersMerge, and then select View Snapshot Agent Status.
- The current status of the Snapshot Agent job for the publication appears. Ensure that the snapshot job has succeeded before you continue to the next lesson.
View Snapshot Agent Status - AdvWorksSalesOrdersMerge
Agent type: Snapshot Agent
Publication: AdvWorksSalesOrdersMerge
Publication database: [AdventureWorks2012]
Duration: 00:00:02
Last status message: [100%] A snapshot of 3 article(s) was generated.
Add the Merge Agent login to the PAL
- Connect to the publisher in SQL Server Management Studio, expand the server node, and then expand the Replication folder.
- In the Local Publications folder, right-click AdvWorksSalesOrdersMerge, and then select Properties.
- a. Select the Publication Access List page, and select Add.
- b. In the Add Publication Access dialog box, select
<Publisher_Machine_Name>\repl_mergeand select OK. Select OK again.
For more information, see:
Create a subscription to the merge publication
In this section, you add a subscription to the merge publication that you created previously. This tutorial uses the remote subscriber (NODE2\SQL2016). You then set permissions on the subscription database and manually generate the filtered data snapshot for the new subscription.
Add a subscriber for merge publication
- Connect to the subscriber in SQL Server Management Studio, and expand the server node. Expand the Replication folder, right-click the Local Subscriptions folder, and then select New Subscriptions. The New Subscription Wizard starts.
- On the Publication page, select Find SQL Server Publisher in the Publisher list.
In the Connect to Server dialog box, enter the name of the publisher instance in the Server name box, and select Connect.
- Select AdvWorksSalesOrdersMerge, and select Next.
- On the Merge Agent Location page, select Run each agent at its Subscriber, and then select Next.
- On the Subscribers page, select the instance name of the subscriber server. Under Subscription Database, select New Database from the list.
In the New Database dialog box, enter SalesOrdersReplica in the Database name box. Select OK, and then select Next.
Merge Agent Location Options
Run all agents at the Distributor (push subscriptions)
This option makes it easier to administer the synchronization of subscriptions centrally.
Run each agent at its Subscriber (pull subscriptions) ✓
This option reduces the processing overhead at the Distributor and lets each Subscriber administer the synchronization of its subscription.
| Subscriber | Subscription Database |
|---|---|
| NODE2\SQL2016 | SalesOrdersReplica |
- On the Merge Agent Security page, select the ellipsis (...) button. Enter
<Subscriber_Machine_Name>\repl_mergein the Process account box, and supply the password for this account. Select OK, select Next, and then select Next again. - On the Synchronization Schedule page, set Agent Schedule to Run on demand only. Select Next.
Merge Agent Security
Process account: <Subscriber_Machine_Name>\repl_merge
Connect to Publisher: By impersonating the process account
Connect to Subscriber: By impersonating the process account
Synchronization Schedule
Agent Schedule: Run on demand only
Subscriber: NODE2\SQL2016
- On the Initialize Subscriptions page, select At first synchronization from the Initialize When list. Select Next to proceed to the Subscription Type page, and select the appropriate subscription type. This tutorial uses Client. After you select the subscription type, select Next again.
- On the HOST_NAME Values page, enter a value of adventure-works\pamela0 in the HOST_NAME Value box. Then select Finish.
- Select Finish again. After the subscription is created, select Close.
HOST_NAME Values Configuration
Purpose: Specify HOST_NAME function values, which are used to filter data in each subscription.
| Subscriber | HOST_NAME Value |
|---|---|
| NODE2\SQL2016 | adventure-works\pamela0 |
Set server permissions at the subscriber
- Connect to the subscriber in SQL Server Management Studio. Expand Security, right-click Logins, and then select New Login.
On the General page, select Search and then enter <Subscriber_Machine_Name>\repl_merge in the Enter the Object Name box. Select Check Names, and then select OK.
- On the User Mapping page, select the SalesOrdersReplica database and select the db_owner role. On the Securables page, grant the Explicit permission to Alter Trace. Select OK.
User Mapping Configuration
Login: NODE2\repl_merge
Database: SalesOrdersReplica
Role: db_owner
Securables: Alter Trace (Explicit permission granted)
Final Steps
You have successfully configured merge replication between a server and mobile clients. The subscription is now ready for synchronization, and the filtered data will be replicated based on the HOST_NAME value specified for each subscriber.
Merge Replication Setup Complete!
You have successfully configured merge replication for mobile clients. Each subscriber will receive a uniquely filtered subset of data based on their HOST_NAME value, making this ideal for mobile scenarios where different users need different data partitions.
Start synchronization and initialize the subscription
- Connect to the subscriber in SQL Server Management Studio.
- Make sure that the SQL Server Agent is running. If it's not, right-click the SQL Server Agent in Object Explorer and select Start. If this step fails to start your agent, you'll need to do so manually by using SQL Server Configuration Manager.
- Expand the Replication node. In the Local Subscriptions folder, right-click the subscription in the SalesOrdersReplica database, and then select View Synchronization Status.
Select Start to initialize the subscription.
View Synchronization Status - SalesOrdersReplica
Subscription: AdvWorksSalesOrdersMerge
Publication: AdvWorksSalesOrdersMerge
Publication Database: NODE1\SQL2016:[AdventureWorks2012]
Duration: 00:00:02
Last status message: The merge process completed successfully.
In this section, you start the Merge Agent to initialize the subscription by using SQL Server Management Studio. You also use this procedure to synchronize with the publisher.
Create the filtered data snapshot for the subscription
- Connect to the publisher in SQL Server Management Studio, expand the server node, and then expand the Replication folder.
- In the Local Publications folder, right-click the AdvWorksSalesOrdersMerge publication, and then select Properties.
- a. Select the Data Partitions page, and select Add.
- b. In the Add Data Partition dialog box, enter adventure-works\pamela0 in the HOST_NAME Value box, and then select OK.
- c. Select the newly added partition, select Generate the selected snapshots now, and then select OK.
Data Partition Configuration
Purpose: Create filtered snapshots for specific subscribers based on HOST_NAME values.
| HOST_NAME Value | Status | Action |
|---|---|---|
| adventure-works\pamela0 | Generated | Snapshot created for filtered data |
For more information, see:
Synchronize the subscription to the merge publication
Tutorial Complete!
You have successfully configured and synchronized merge replication between a server and mobile clients. The subscription is now active and will replicate filtered data based on the HOST_NAME parameter, making it perfect for mobile scenarios where each user needs their own data partition.
Final Conclusion
You have successfully completed both transactional and merge replication tutorials. These comprehensive guides provide you with the knowledge to implement robust SQL Server High Availability and Disaster Recovery solutions for your enterprise applications.
